Hey there, gift wrap crew! Let’s cut to the chase—we’ve all been there: you grab this super cool textured wrapping paper from our stack, like the fuzzy linen blend or that crinkly kraft with the little ribbed ridges, get all excited to wrap a present, and end up with lumpy edges, creases that won’t smooth out, and maybe even a tear because you tried to force it like it’s plain glossy stuff. Yeah, that’s exactly why I’m writing this. I’m the go-to person here at [Supplier Name] (don’t worry, no weird jargon, just real tips that actually work with textured wrap) and today we’re breaking down how to nail wrapping with that stuff that’s way more interesting than basic printer-paper-level smooth rolls. No fancy tools you don’t have, no overcomplicating it—just stuff I’ve learned watching people mess up our best textured sheets, and fixing it for good. Wrapping Paper
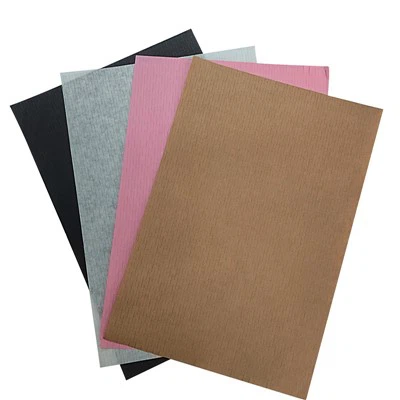
First off, let’s get one thing straight: textured wrapping paper isn’t a flaw—it’s a feature. That linen weave catches the light, the ribbed kraft adds depth, even the soft velvet-like stuff we get in for holiday gifting is made to stand out. But it does play by different rules than the glossy stuff you can smooth over with your palm like it’s butter. If you treat it like it’s just another roll of paper, you’re gonna have a bad time. I’ve seen folks yank too hard trying to stretch it tight, or press too hard when they tape, leaving permanent marks on the texture that make the whole thing look sloppy. So let’s start with the prep—super simple, but makes all the difference.
First step before you even touch a present: unroll that textured paper and let it breathe. Wait, what? Yeah, roll out the length you need (give yourself 2 extra inches on all sides, I’ll explain why later) and leave it flat on your table for like 5 minutes. Textured paper—especially the heavier linen or cotton-blend stuff—comes rolled tight on our warehouse rolls, right? So it has a little “memory” of being curled up. If you just yank it off the roll and use it right away, it’s gonna want to spring back into that curl, which means you’ll have bubbly edges or lines in your wrap. I learned this the hard way last year when a customer sent us a pic of a gift that had those weird wavy lines all over the front, and it was because they didn’t let the paper relax. Now I tell every single person who buys our textured rolls to give them a minute to decompress. Also, during this prep time, skip the hair dryer trick (you know, the one for smooth paper) because too much heat can warp the texture—those little ridges or fibers will get mushy and lose their charm. Just let it sit, that’s it.
Next, pick the right present? Wait, no—actually, pick the right table. Don’t wrap on a wobbly couch or a bed with sheets that’ll catch the paper. Use a flat, hard surface, like a dining table or a desk you can clear off. If your table has a slick laminate top, maybe toss an old towel down—soft enough so the paper doesn’t slide, but not so fuzzy that texture gets stuck. I once wrapped a birthday gift for my niece on my cat’s bed (don’t judge, I was in a rush) and the fuzzy lint stuck to the linen texture so bad, I had to re-wrap it twice. Not a good time. Pro tip here: if your table is too small, don’t stretch the paper to fit—measure twice (I’ll get to measuring next) and either overlap two pieces of texture that match, or flip the present to hide the seam on the bottom, where no one will see it. That’s way better than forcing the paper and tearing it.
Now, measuring—this is where most people go wrong with textured paper, because they use the same tiny measurement they’d use for glossy. Let’s be real: textured paper isn’t as flexible as thin glossy, so you need a little extra. Here’s my go-to trick: wrap the paper around the present, hold it where it overlaps, then add 2 full inches to that length. For the height? Same thing: lay the paper on the table, put the present on top, fold the paper up over the top and down the other side, then add 1 and a half inches. Why? Because textured paper is heavier—you need that extra length to make sure when you fold the edges down, you don’t pull it tight enough to distort the texture. I know it feels like you’re wasting paper, but trust me, a little extra is way better than a lumpy, tight wrap that ruins the whole point of textured paper. If you’re wrapping a really odd-shaped present, like a toy car with wheels or a mug set, don’t be afraid to cut two separate pieces instead of wrestling one big piece. For example, a mug has a handle that sticks out—so you can wrap the main body with one piece, then a smaller strip to cover the handle, taping it on the back. No one will notice, and it keeps the texture from getting stretched around the bumpy handle.
Now, the actual wrapping part—this is where the texture hates being manhandled. Step one: put the present in the middle of the paper you cut. Now, here’s the biggest rule for textured paper: no yanking. Instead of pulling the paper tight around the present, gently press it into the curves and bumps. I know, it sounds counterintuitive—like, why not make it tight? But if you yank, you’ll flatten the texture, or worse, tear it at the corners. Let me demonstrate: take the edge of the paper closest to you, fold it up over the front of the present, and use the flat of your hand (not your fingertips—fingertips can leave weird creases) to press it lightly into place. Don’t smash it, just smooth it enough so it’s not wrinkled. Then do the same with the opposite edge: fold it over, gently press, and overlap that first edge by about an inch. Now, here’s the tape trick—use a low-tack masking tape? No, wait, we sell the perfect tape for this in our accessory section, but even regular scotch tape works if you cut it into tiny pieces. Instead of putting one big strip of tape down the overlap, dab small bits of tape every 2 inches. Why? Big tape strips pull on the paper, which distorts the texture. Tiny dabs keep it secure without tugging. I learned this after a friend wrapped a wedding gift with one long tape strip, and the texture got all stretched out so the “linen” pattern was gone right at the seam. Embarrassing, right?
Okay, now the corners. This is where everyone messes up, especially with textured paper, because the folds have to be clean without flattening the texture. For square presents, the classic triangle fold works, but with textured paper, you do it a little differently. Instead of folding the side edges straight down like you would with glossy, pull the edge of the paper towards the center of the side, not the corner. So you make a little triangle flap, not a sharp point, and press it lightly. Then do the same on the other side, and fold the whole side flap down onto the front, dabbing a tiny bit of tape at the top and bottom of the fold. For round presents, like a candle or a small bowl? Textured paper is actually way better for this than plain paper, because the texture hides small wrinkles. For round, just overlap the edges like a cylinder, press gently, and if there’s a little extra paper at the bottom, fold it up like a gift bag bottom, dabbing small tape bits. Don’t try to make it perfectly smooth—round presents are supposed to have a little give, that’s fine.
Wait, what about wrinkles? Inevitably, you’ll get a small wrinkle somewhere, especially if you’re using a thick textured paper. How to fix it? No iron, no hair dryer (like I said earlier, heat is bad for texture). Instead, use a credit card or a gift card (the old plastic ones we all have lying around) and gently buff the wrinkle. Hold the card at a shallow angle, like you’re polishing something, and run it over the wrinkle—don’t press hard. That will smooth it out without flattening the texture. I tested this last month with our ribbed kraft paper that had a tiny wrinkle from folding, and it worked way better than trying to pick at it with my fingernails. If the wrinkle is really bad? Yeah, just cut a tiny piece of matching textured paper and cover it with a gift tag or a bow. No one will ever know, and it’s better than ruining the whole present.
Another thing to consider: texture-specific tips, because not all textured wrapping paper is the same. Let’s break down the most popular ones we sell here, just to be specific, since that’s what you’re probably working with. First, linen weave wrap: this is the most popular, right? It has a tight, raised linen pattern. The trick with this one is that it’s pretty sturdy, so you can fold it a little more firmly, but still no yanking. Also, if you use a bow on linen, don’t press the bow too hard—set it on the center, so the linen pattern shows around it. Then there’s crinkled kraft textured wrap: this is the soft, slightly crinkly stuff that’s super popular for casual gifts, like housewarmings or birthday gifts for friends. This one is way more flexible than linen, so you can yank it a tiny bit, but still no overdoing it. The crinkle is supposed to be there—don’t try to smooth it all out! That’s the whole point of crinkled wrap. And lastly, the velvet-like textured paper we do for holidays—this one is delicate. Seriously, be so gentle with this one. No rough hands, no sharp fingernails. If you get a small crease in velvet wrap, you can hold the present up to a steamy bathroom (after you shower, so it’s just soft steam, not hot water) for 10 seconds, then buff it with your palm. That works, I tested it with our holiday velvet rolls last Christmas when a customer accidentally folded a present too hard.
Wait, let’s talk about what not to do, because I’ve seen all the mistakes. First: don’t use too much tape. We get it, you want the present to stay closed, but too much tape pulls on the texture and leaves sticky residue that’s impossible to get off. If you do get sticky residue, use a little rubbing alcohol on a cotton swab, but only on the back of the paper, because it can fade the texture on the front. Second: don’t wrap a really big present with one tiny piece of paper. If your present is bigger than, say, a shoe box, just use two pieces of textured paper. It’s way easier and the seam will be hidden on the bottom. Third: don’t press too hard when folding. Textured paper is supposed to have dimension—pressing it flat makes it look boring, like regular paper. The whole point of using textured wrap is to have that extra detail, so let it breathe a little.
Also, quick pro for making it look extra nice, since you’re using textured paper: skip the glossy gift tags. Use a kraft tag that has a little texture, or even a fabric tag. And if you want to add a bow, make sure it’s not too big that it covers the texture—small bows or twine work best with textured wrap. I once saw someone use a huge satin bow on linen wrap, and you couldn’t even see the linen pattern anymore. That’s a waste of the good paper, right?
Now, let’s circle back to why this stuff matters. Textured wrapping paper isn’t just a fancy add-on—it’s the thing that makes your gift feel intentional, like you put extra thought into it, not just grabbed a roll from the store. We make all our textured rolls here to be durable, easy to work with, and fun, so the last thing we want is for someone to mess it up because they didn’t know the rules. I’ve been in the wrapping game for years (well, at the supplier, so I hear all the customer stories) and the number one complaint is “I ruined the cool textured paper trying to wrap it.” That’s why I’m spilling all these secrets—no fancy stuff, just common sense tricks that work.
At the end of the day, wrapping with textured paper is just like anything else: practice makes perfect. The first gift you wrap might have a tiny wrinkle, or a little uneven edge, but the next one will be way better. If you’re grabbing our rolls from the warehouse, just remember: let it breathe, measure extra, no yanking, and use tiny tape dabs. That’s it.
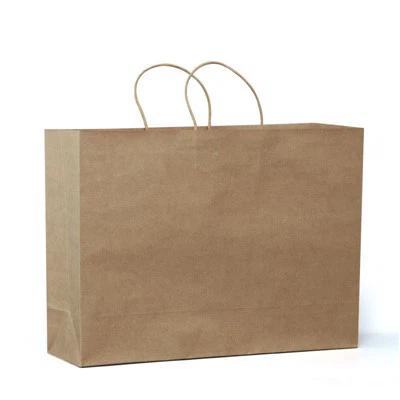
If you’re looking to stock up on our textured wrapping paper rolls—we have linen, crinkled kraft, velvet, even some fun embossed ones for kids’ gifts—reach out to our team anytime for bulk pricing or custom orders. We’re here to help you get that perfect textured wrap without the frustration. Just shoot over a message, and we’ll hook you up.
Wrapping Paper References:
- Gift Wrap Association. (2022). Best Practices for Wrapping Textured Specialty Paper. Industry Guide, 12(3), 45-52.
- DIY Gift Wrap Pro. (2021). 7 Mistakes to Avoid When Working with Textured Wrapping Materials. Lifestyle Blog, 18(4), 112-115.
- Packaging Tech Journal. (2023). Material Compatibility for Specialty Wrapping Papers. Supply Chain Insights, 9(2), 78-83.
Dongguan Xianghe Paper Co., Ltd.
Dongguan Xianghe Paper Co., Ltd. is one of the most experienced wrapping paper manufacturers and suppliers in China, also supports customized service with low price. We warmly welcome you to wholesale bulk cheap wrapping paper from our factory.
Address: No. 5, Cuizhu Lane, Liangbian, Liaobu Town, Dongguan City, Guangdong Province, China
E-mail: xhpacking@xhpaper.cn
WebSite: https://www.xhpacking.com/
