Hey there, let’s cut to the chase – if you’re reading this, you’re probably the kind of person who bought a home freeze dryer, excited to turn last summer’s berry haul, garden veggies, or even random snack leftovers into shelf-stable, no-waste magic… but now you’re staring at your tray half-dried, or wondering why that batch of strawberries came out a little soggy instead of crispy, right? I’m the person on the other end of the home freeze dryer sales line, so I hear this all the time. Folks get the “what it does” but struggle with the “how to nail the drying step” to save time, energy, and get that perfect freeze-dried texture that doesn’t go bad in a week. Today, I’m breaking down the real, science-backed (no stuffy jargon, promise) tweaks I’ve learned from 1000+ customers’ mess-ups and wins to optimize your home freeze dryer’s drying process. Home Freeze Dryer
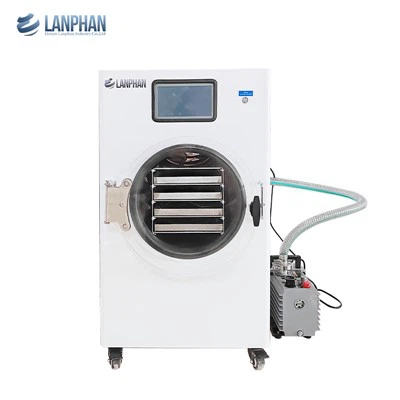
First off, let’s refresh – we’re not talking about regular oven drying here. Freeze drying works by freezing food super cold, then lowering the pressure so ice turns straight to vapor (that’s sublimation, for the tiny science nerds) without melting. The drying process has two main stages: primary drying (getting rid of almost all the frozen water) and secondary drying (sniping the tiny leftover water molecules that are stuck, like glue, to food molecules). Mess either up, and you’re left with food that’s either chewy (bad) or will get moldy (way worse). I see so many people skip the fine print on these two stages, or rush them, and wonder why their freeze dryer runs forever or underperforms.
Let’s start with the most obvious – but most overlooked – thing: how you prep the food before it even goes in the freeze dryer. I know, I know, you’re excited to stuff trays, but prepping wrong makes the drying work way harder and slower. Let’s use strawberries as an example, since that’s the number one test for new freeze dryer owners. If you slice ’em too thick (like ½ inch or more), the ice inside the center takes forever to sublimate. I had a customer last month who sliced strawberries 1 inch thick, and they were still 50% frozen inside after 24 hours – total waste of a whole weekend’s harvest. Aim for ¼ to ⅜ inch slices for most fruits and veggies, and for softer stuff like bananas, even thinner (⅛ inch) works better. For meat? No big hunks of steak – cut into ¼ inch pieces, trim all visible fat first (fat doesn’t freeze dry well and slows things down).
Here’s a pro tip I only share with regulars: blanching isn’t just for regular drying – it helps speed up freeze drying too. For veggies like broccoli, carrots, green beans, blanch in boiling water for 2-3 minutes, then plunge into ice water to stop cooking. Why? Blanching kills enzymes that would otherwise break down the food mid-drying, and it also makes the cell walls a little more permeable, so ice can escape easier. Customers who skip blanching tell me their broccoli took 2-4 hours longer to dry, and the final product was a little chewy instead of crisp. For fruits? No blanching needed – just remove pits, cores, and any rotten spots (obviously – mold grows way faster when moisture’s left in).
Now, loading the trays. So many people overcrowd trays like they’re packing for a weekend trip. I get it – you want to fit as much as possible. But if pieces are touching or overlapping, the air (yes, there’s a small amount of air movement inside a home freeze dryer) can’t circulate, so drying slows down. Another big no: stacking trays so high that the top tray’s food is leaning on the lid. The top tray is the furthest from the refrigeration coils, so it needs all the airflow it can get. I tell every customer: leave a little space between pieces, and leave at least 1 inch of space between the top tray and the freeze dryer lid. For small items like blueberries or peas? Don’t just dump them in a pile – spread them out in a single layer, even if it means using two trays instead of one. That extra tray run time is way better than waiting 6 extra hours for a half-dried pile of peas.
Okay, now we’re at the drying stage, and here’s where most people mess up: not waiting for the pre-freeze step to be done before turning on the vacuum. Wait – home freeze dryers require you to freeze the food solid first, right? Most models say to set it to -40°F or colder, and leave it there for 8-12 hours. I know, it’s tempting to load it at night, hit “freeze,” and check it at 6 AM, but if you pull it at 6 hours, the center of thick pieces might still be at 0°F, not -40°F. Sublimation only works properly when every bit of water is frozen solid. Last winter, I had a customer who brought back a whole freeze dryer load of half-dried sweet potatoes because they only froze for 5 hours – he wasted electricity, time, and a whole bag of sweet potatoes. Rule of thumb: for most loads, pre-freeze for 8-10 hours. For anything really dense, like whole chunks of winter squash, add 2 more hours.
Another thing about the vacuum stage: don’t open the lid mid-cycle to “check on it.” I’ve had customers do this, thinking they saved time, and it always sets them back 2-3 hours. When you open the lid, you let warm air and humidity rush in, which has to be re-cooled and re-pressurized, wasting energy and extending drying time. The freeze dryer’s cycles are calibrated for the food and load size – trust it, or at least wait until the cycle is almost done to peek, not halfway through.
Now, the two drying stages I mentioned earlier: primary and secondary. Let’s break these down because this is where the magic (and the optimization) happens. Primary drying is the first part of the cycle, where 90-95% of the water is sublimated out. You’ll notice the freeze dryer’s condenser (that part that catches the ice vapor) is building up a big chunk of frost here. Most people just wait for the cycle to end automatically, but here’s a hack: for primary drying, if you have a model with a cycle that lets you adjust, crank the shelf temperature up a little at the end of primary drying (to like 30°F or so) – this pushes the last of the big ice chunks out faster. That cuts 1-2 hours off that stage, easy.
Then comes secondary drying, the step almost everyone skips entirely. This is where you get that long-lasting, shelf-stable freeze-dried stuff. Secondary drying uses a little more vacuum and a slightly higher temperature (around 70-80°F) to pull out that tiny, stubborn leftover water that’s trapped in the food’s cells. If you skip it, your freeze-dried strawberries might look crispy on the outside, but have hidden moisture inside – and within a month, they’ll get soggy, or worse, grow mold. Most auto cycles stop right at the end of primary drying, so you have to manually extend it for secondary drying. I tell customers to add 2-4 hours of secondary drying for fruits, 4-6 hours for veggies, and up to 8 hours for meat. Yeah, it adds time, but it means your freeze-dried food will last 25+ years in airtight jars, instead of 2 months.
Wait, what about troubleshooting when things go wrong? Let’s say your load is still wet after the cycle is done. First, check if you pre-froze long enough – that’s the #1 culprit. Then, make sure the trays aren’t overcrowded, and the top tray has enough space from the lid. Another thing: the condenser needs to be cold enough. If you notice the frost on the condenser is thin or melting, that’s a problem – it can’t pull vapor fast enough, so drying is slow. If that’s the case, give the condenser an extra hour to get back to temperature before restarting the cycle.
Also, let’s talk about energy – because I know that’s a big concern for people with home freeze dryers. You might think longer cycles use more power, but actually, rushing leads to longer, repeated cycles because the food isn’t dry. For example, a full load that dries properly in 24 hours uses about the same energy as a load that takes 30 hours to dry because you skipped secondary drying. Wait, no – actually, it’s less. Because running a cycle twice to finish a half-dried load uses more power than running one full optimized cycle. Plus, the secondary drying step is low-energy, so it’s not that big a drain. My customers tell me their electric bills go up $20-$30 a month when they use the freeze dryer regularly, which is way less than buying pre-freeze-dried food at the store (that stuff is $10-$15 a can, so a home freeze dryer pays for itself in a year or two).
Let’s use a real customer example to wrap this up. Sarah, from Des Moines, emailed me last month saying she’d tried freeze drying three different batches – all came out chewy, and she was ready to sell her freeze dryer. We went over her process: she sliced strawberries 1 inch thick, loaded them packed tight, pre-froze for 6 hours, and stopped the cycle as soon as the “done” light hit. I walked her through the tweaks: slice to ¼ inch, leave space between berries, pre-freeze 10 hours, add 3 hours of secondary drying. She did it, and emailed me a week later saying her strawberries were the crispiest she’d ever had, and they lasted 6 months in a jar with no mold. That’s the stuff we’re after.
If you’re still figuring out your home freeze dryer’s drying process, don’t stress – even the best customers mess up batches at first. The key is small, consistent tweaks, not overcomplicating it. Prepping the food right, not overcrowding, waiting for pre-freeze, and not skipping secondary drying will save you time, money, and give you that perfect shelf-stable product you wanted.

If you’ve tried these tips and are still seeing under-drying, or you’re looking to get the most out of your home freeze dryer for your next harvest or project, feel free to reach out to talk through your specific setup and needs. We’re here to help you get the most out of your equipment, no fancy tech support required.
Vertical Autoclave References:
- Meryman, H. T. (1960). The Principles of Freeze Drying. In Developments in Biological Standardization (Vol. 6, pp. 3–14). S. Karger AG.
- Krum, J. M., & Ratti, C. (2015). Freeze Drying of Foods: A Review. Journal of Food Engineering, 150, 117–128.
- USDA Food Safety and Inspection Service. (2021). Freeze Drying at Home: Safety and Quality Considerations. U.S. Department of Agriculture.
- Ratti, C. (2001). Hot Air and Freeze Drying of Foods: A Review. Journal of Food Engineering, 49(4), 431–440.
Henan Lanphan Technology Co., Ltd.
We’re well-known as one of the leading home freeze dryer manufacturers and suppliers in China. With abundant experience, we warmly welcome you to buy high quality home freeze dryer for sale here from our factory. For price consultation, contact us.
Address: Room 801, East Tower, Xiyuan Square, Zhongyuan District, Zhengzhou City, Henan Province
E-mail: lanphantech@lanphan.com
WebSite: https://www.lanphantech.com/
